Saturday, March 31, 2012

Facebook Follower Giveaway?

Am I going to have a giveaway?

If I can get 50 Facebook followers, then yes, I will have one! 

It will be fore THREE original, one-of-a-kind frankens made by me. Of course, I am talking about a "mixed" franken using store-bought (or internet-bought) polishes but I think this is the best way to get your hands on a fun and colorful mix of polishes!

What do you say? Can you go to 
and LIKE me? :)

Nail Stamp Layering: A Basic Tutorial

Before I begin, let me share a little advice with anyone reading this: Test your stamping on paper before doing your mani! I say this as someone who fails to do this on a regular basis, hehe. But truly, it saves you from having a design you are not happy with and helps you test the opacity of polishes you are using for stamping. 

For this design, I knew I wanted to make a mani to do this tutorial, so I chose to keep the color scheme monochromatic. This is easier for beginners and I just know most nail addicts have at least one color group over-represented in their stashes ;)

The base I am using is Essence Gleam in Blue, a frosty, shimmery medium blue.


For the second step, I am choosing to use a bottom stamping layer as a sort of "wallpaper" background for the top two layers. 

So I chose a color that was noticeable on the base color but also subtle. In the photos below, it appears more bold than it does in real life. I used Sally Hansen Barracuda for this layer because it is relatively transparent and light colored. 

On the index finger, I have stamped the second layer in Kleancolor Retro Green (I know, it is really blue). I stamped this on paper to test the contrast first (Sorry it is smeary).


My final element or the top layer of stamping is in Konad Special White to really pop from the background. All of these designs are on the Cheeky XL C plate. Experiment a bit and see what works!


I think it looks a little like embroidered blue jeans, what do you think?


Thanks for looking and don't forget to LIKE me on Facebook!!

Thursday, March 29, 2012

Facebook Fan Page

Hello all!

I started a Facebook fan page, just head over to

and click Like!

Blog posts will be published there and everything!

Tuesday, March 27, 2012

Teal Tuesday: Water Giraffe (Bonus Franken!)

I love my mani! Teal Tuesday's theme this week was Animal Print. I kinda figured most people would have a cat/zebra kinda print and I had not tried out my giraffe print from my DRK-A plate yet. I had to practice before my mom, a HUGE giraffe lover, gets here. 

I used Essie Turquoise and Caicos with an aqua shimmer tc (no name) and Konad Special White polish.


Bonus franken photos!


What I used is:
NYS Hot Baby Blue
NYC High Line Green and Blue Water Street (both new colors in the In a NYC Minute line)
LA Girl Glitter Addict in Nostalgic and Flash
$OPI in Traffic Stopper Copper (just a lil bit)
for the large copper pieces, Kleancolor Chunky Copper
Also added some Pure Ice Heartbreaker for extra sheen/sparkle

I am gonna wear this sometime this week! I also need to schedule my thesis defense....eeek

Saturday, March 24, 2012

Stamping Sunday: Black and White Layered Stamping

I got my Cheeky XL plates this week!! YAY!! I got B and C and I decided to do this Black and White stamping challenge using Cheeky B. B has mostly organic and natural designs.

What did I use?
Konad Special polish in Black and White (for the top-most stamps)
Essie Waltz for the understamping on the black nails
Black jelly franken for the understamping on the white nails
White nails are painted with Sally Hansen White On
Black nails are painted in WnW Black Creme


No, I did not clean up this mani very well. I had a lot to do today (and I shouldn't be posting now!) but I think it looks fine even without being perfect. 

I chose the understamp specifically because it had thinner lines and a repeating pattern. The stamp over it is a thick lined, high contrast overlay. I am pretty proud of it!! :))

A Post About Cleanup

Hello again, I am a posting fool this week while trying to put off writing another chapter of my thesis...!

I have a special topic today, that of cleanup!


Because the ELF concealer brush did not work for me for cleanup (too thick and the bristles were short!), I decided to get out one of my flat topped acrylic brushes out for modification.


This is a synthetic brush and was in a package of 8? for $2.99 or something at Hobby Lobby.
It used to be flat! I kinda snipped here and there to get it to a decent shape. Notice that I thinned it; I did this by razoring down the sides at the top of the bristles. I did this along the edges, as well, to make it less wide.


Here, I am pretending to clean up my nails. Just demonstrating how it can leave a small gap. 


Closeup! Note: this mani did not get a cleanup! :O


From the previous post, a close up of an actual cleaned up mani!


And another one! (piCture pOlish Jade)


I have been using it when I feel like it (and mostly on my right hand...) for a few months and it is pretty awesome. I feel like a longer bristle with a shorter width and thinner profile definitely helps. I can be more precise and get a thinner cleanup line.  Maybe this can help those who need to make a better cleanup brush and can't slap down the $$ for a nice kolinsky!

Friday, March 23, 2012

Girly Girl Gold and Pink Stampicure with bonus Gradient!

I will be honest: if I ever had a pink mani, I blocked it from my memory. When I saw this polish (Pretty in Pink) in the Dollish Polish store, I had to have it! Or at least get a mini since I don't wear them a lot >_>
It is slightly duochromey, with a pink-blue and pink-orange shift. It was a little hard to work with but that may be because it is a bit sheer. I globbed it on and it got a little bubbly. That will teach me to be impatient!


And then I had to stamp over it!


I used a Hello Kitty Gold Star gradient on the ring finger and DRK-A for the stamping with Sally Hansen Gold Chrome. It is a little crooked but I was still learning! 


After this mani, I decided that the side-to-side roll method of stamping is preferable to the "Stick it in the middle and move side to side" method O_O 

I was happy with it, though! :)


Wednesday, March 21, 2012

Teal Tuesdays (more catching up!): Glitter Freestyle (with Franken)

I joined another challenge group this week (also in Adventure in Stamping, as my last blog was about that challenge) and this one is dedicated to Teal Tuesdays! I am a huge teal fan, and all derivative and related colors (look at my background and theme!) so this is awesome to me. It helps me use some of my hoarded (this is in the 'verb' sense, not the sickness sense) blues and greens and blue-greens. 

So my mani this week was my very own true teal franken (I don't consider OPI Ski Teal We Drop to be true teal) topped with Lacquistry Lake Placid on Acid and THEN topped with Essence Edward (a treasure!)


No fan of holo glitter, but it was in with the teal stuff so...I don't mind it here!


Look at them cutes! *proud*


I feel I succeeded! TEAL FOREVER!

Stamping Sunday (playing catch-up!): 80s Circles Skittles!

This week, the theme is circles. Bright skittles, circle fauxnad...awesomesauce!

I used a Red Angel plate and Konad Special Black. The purple, orange, and pink are from a Sally Hansen mini Insta Dri polish set. They are not as good as normal Insta Dris, tho :(
The blue is Sinful Colors Grecian Sun and the green-yellow is Sinful Colors Innocent


I got a little crazy the next day....


...and added some Sticks and Stones!

WARNING! SC Innocent STAINS! This mani is from over a week ago (March 11th) I still have stains on my naked middle finger nails :(


This Sunday, it may end up being Black and White as a theme! So excited!

Sunday, March 18, 2012

Some recent frankens

Hello all! I have recently putzed around with some indie polishes (top coat glitters) and wanted to share my results. I got some new glitters and New York Summer jelly polishes (LOVE these for frankening) so I had some fun.

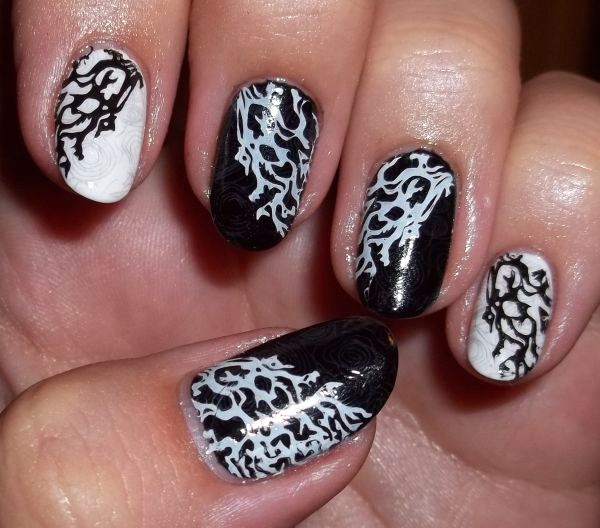
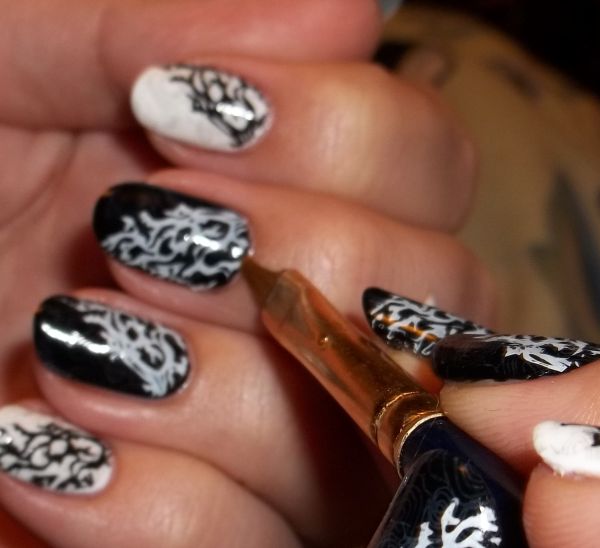
First up! I call this one "Choke on my Eleganza!" after a line in RuPaul's Drag Race, one of my absolute favorite shows. Sorry for the hairs in the photos, I moisturized and I have 2 cats. O_O


Yes, I love this polish! 

What I used:
LA Girl Glitter Addict in: Euphora, Aqueous
A teeny bit of Jordana Celebration and Celestial
LA Colors Silver Glitter
Wet n Wild Black Creme (for the jelly base)
Wet n Wild Kaleidoscope
Pure Ice Once Again

Now for some franken swatches!


Left: One coat over Sa-Greena, Middle: Two coats, Right: Three coats


Polishes used
L to R: Wet N Wild Sa-Greena the Teenage Witch and The Gold and the Beautiful, Essie Going Incognito, Kleancolor Gold Tiara and Chunky Copper, LA Girl Glitter Addict in Flash and Flamboyant, franken bottle.


More!
Here, I messed around a bit with Essie Candy Apple, All that Glitters Spottie Dottie Light and Dark, Dollish Polish Puttin on the Ritzzzzz, and Spoiled Shuffle the Deck (which is a horrible franking polish! so sparse!)


The middle is a jelly franken made from NYS Amaranth and Hot Sky Blue. The purple franken was made with a $1 holiday Hard Candy mini as was the one on the right. The purple is kinda indigo and was colored with Nails Inc. Belgrave Place and NYS Hot Sky Blue. The one on the right was the same color combo as the middle franken but with some of the Hard Candy silver sparkle base.


This one is fun. I used NYS Hot Purple as the base and added LA Girl Glitter Addict in Euphoria, Sephora by OPI in Indi-Go with the Flow (light indigo glitter), some bits of pink and purple glitter from another franken (not much), and All That Glitters Spottie Dottie Light for the white glitter. 


The blue on the left: 2 coats (thick coats) NYS Hot Baby Blue and NYS Hot Sky Blue with Dollish Puttin on the Ritzzzz, Dollish Random Dancing, and Spoiled Trust Fund Baby. I LOVE THIS ONE!
The coppery gold: LA Girl Glitter Addict in Flare and Flamboyant, China Glaze Blond Bombshell, and...that is it! A simple but dense franken (That is one coat!)

Hope you liked them!

Wednesday, March 14, 2012

Blog Sale!

My blog sale is up and running (link at the top of the page). I went to the big city a few weeks ago and picked up some things at Walgreens to bring back here so I could share with all of you. I only kept a couple things for myself. I know some people do not have access to the new Sinfuls or Nabi Magnetics. There are also some other random things in there.

I am willing to barter, I would just like to move it out. I ask that the minimum order be $10 (before shipping) because I am really busy right now. Thank you, hope you find something you were looking for :))

Friday, March 9, 2012

Two sets of nail art

Two practice nail art sets!

Design 1: Winter to Spring


This design needs some work! I need to draw the tree branches first and I may paint this one on a baggie!

Design 2: Cute Berries and a Cherry


Needs more contrast! And some cleaner lines...

Posted by Picasa

A Few Recent Manis

This is a Konad I did recently in some of my favorite colors!
Thumb: Sally Hansen Mint Sprint; Index: Essence Go on Green; Middle: China Glaze Aquadelic; Ring: Sally Hansen Jade Jump; Pinky: Essence U Belong to Me


The design is a curved Konad design that I used at the moon of the nail instead of the tip. I loved this mani but I think the Julep Nail Treatment base coat was making it chip like crazy. Made me so mad! 


For this mani, I used Wet n Wild Haze of Love (my favorite reddish color!) as a base and tried a sponge-gradient with Missha JRD01


It...sorta worked! I got wear really fast, again, the Julep Nail Treatment is not a good base coat :(


And this is the one I am taking off tonight. I got Nails Inc. Belgrave Place and Sephora by OPI nail jewelry top coats in Indi-go With the Flow and Traffic Stopper Copper. Here is something I found out about colors this pigmented: You need to wait until the base coat is fully dried before putting on glitter. Yes, it sank into the base coat AND got dyed purple! So now I know! I tried laying down a coat of Indi-Go with the Flow (sank, dyed purple) and a thin layer of TSC (dyed...pink...) and I finally just waited over night for it to dry before putting another coat of glitter on. 

Ultimately, I had some failures this week! I am going to be Konading this weekend, though, so I always have fun with those. I also got a Scrubby Tub from Target to test out its glitter removal potential. I hate wasting foil :(