I designed an entry for a nail art contest! She is a friendly mermaid hangin out with her fish friend, all in some of my favorite colors ever :))

In this tutorial, I will show you how I did it!
FIRST: I am going to show you what I used to get the right size nail art. I made guides with my real nail sizes on them.

Like this. Place them in the order (thumb to pinky or pinky to thumb) as well as orientation (edge to eponychium vice versa) that you want them set up for your nail art in. I learned later on in this tutorial that my nail art was going to have to go on my nail upside down from what I had planned, so this is important!

To make the guide, get an index card, tape, and a permanent pen (I used a Sharpie pen). Then adhere the tape to the finger and outline as close to the edge as possible.

Like so!

It will be messy looking but hey, that is DIY! You can leave gaps where you feel like it but try to line them up in a way that will still create flow when you cut the images up. I think you will understand later in this post :)

You should have 2 index cards, one for right hand and one for left. Cut a plastic baggie along its seams (take off the sealer part first).

Then tape the plastic baggie on like so. You want it secure so it does not move around and mess up your art.

These are all the supplies for this art:
Brushes (some very thin ones, some not so thin ones, some filberts)
Scissors and index cards with guides
a white piece of paper to slide between the index card and design
Acetone (scrubby tub!) to clean up with
Paper towel
A lot of nail polish!
There is a ridiculously long polish list so if you really want to know, ask in the comments! Notice that I sketched out what I wanted the design to look like. I realized that my thumb was going to be the least congruent part of the design but it still should be within the theme. This is why I chose to have a seahorse on the thumb and the mermaid in the other fingers.

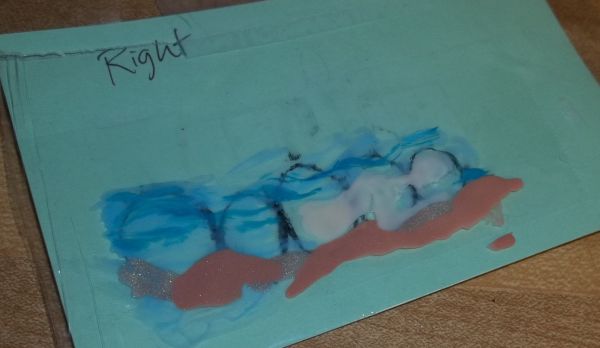
Laying out the background but adding the flesh tone here BEFORE background. If you use polish, you need to be aware of the opacity of each polish and plan accordingly. I knew I was going to use a jellyish French manicure beige for the skin, so I put this down first. Then I added the jelly blue for the sea around the skin tone.

Naturally, I finished up the landscape around the mermaid. Avoiding layering when you can will also keep the design from being so lumpy!

Here is the tail (using Sinful Colors Mint Apple and Zoya Zuza). Notice how I tried to keep particular elements within certain fingers (fin, hips, arm/chest, head).

Detail work should go last. When you work with polish instead of acrylics for nail art, you have to keep in mind how gloopy detailing can get. Try to use thin polishes for these elements. Here, I have begun her hair. I use darker colors first, then medium and light and finish with another medium to even it out.

I added the fish here. I did not get terribly detailed; that can get muddy and sometime simplicity is best (and easiest!)

NOW! It is Seahorse tutorial time, lol. Start with a J shape and a convex top line

Then add another convex line for the nose and sketch in the bottom part (I know their noses are normally thinner, but I was in a rush! Cant all be perfect! ;)

Finish the body by adding a cute belly and fins.

Now you can detail!

After the seahorse, I added in some foliage (undersea foliage, that is) and coral for a pop of color in the tail section.

Another look
Now...do this again for your right (or left) hand!

Once finished, trim the excess baggie but do not get close to the edge. You need some extra baggie to peel off your design.
If you like, you can extend ideal lines from the joining of the index card guides out to help you cut up the image. Or you can place the design over each finger and sketch lines (not on the design!!! on the extra, clean baggie edge) to help you cut.

OH NO! I cut off too much and left one of my pieces too thin for my nail! Well, that is easy enough to fix. Trim off enough to cover a side of your nail from the bigger piece and line up the edges.

Hold them together with two fingers and apply clear top coat. You can also touch up the paint job when you get this piece on your nails.
Now for application!

Add basecoat. Let it dry completely. Then, one finger at a time, add some underwear using whatever color you like. Here, I used Kleancolor Metallic White because I wanted white and shimmery to show through. Let this underwear coat get tacky (not wet, not all the way dry).

Now, split the particular nail section from its baggie backing. This is my index finger I am demonstrating with.

Line it up and lay it down. From the center out, smooth it down with either a dry, SOFT brush or your finger. Once it gets tacky, it is not going to be easy to smooth so do it fast. Make sure you get the edges pushed down.

Now, use a cleanup brush to clean the trim. Go in from the outside, not inside out. You want to use the acetone to get rid of all the trimmings, essentially. The edge of the nail is always difficult, but if your design allows, you can clean it up with more nail polish. That is what I did here because my wrapped edge got dissolved! I just wrapped the edge with some more sandy nail polish.

After you get it on there, give it some time to dry on the top! Quick dry top coat could SMEAR your design, so beware!! Also be careful of bubbles; this will happen when your design is really thick or you top coated it too fast. You are putting a lot of nail polish on there!

I think it is cute :))


Are you going to attempt this any time soon? It is a real investment but the results are pretty rad, especially on your OTHER HAND! That is why the baggie method is awesome. You can have nail art on both hands :))


